

How To Upload Custom Font To Wp Elementor Css
vi Like shooting fish in a barrel Means to Add Google Fonts to WordPress for Custom Typography
Everybody wants their site to exist unique. They don't want to exist stuck with the standard pick like everyone else but express their own style and personality with their website.
One of the easiest ways to customize a website is to add custom fonts to it. After all, text makes upwards large part of it and is an important element of web design.
Luckily, Google Fonts provides a big number of spider web fonts that anyone can use. It's an awesome service and i that many website owners should take advantage of.
Not sure what Google Fonts are? Don't worry nosotros will first become over that role and explain it in particular. After that we volition prove you exactly how you lot tin can add Google Fonts to your WordPress site manually and then do the same again via a plugin.
Gear up to add custom fonts to WordPress? Then allow's get going.
What Are Google Fonts?
Before nosotros go into technical bits, permit's first talk virtually what we are talking about when we say Google Fonts.
Google Fonts is a service where Google provides access to free web typography for anyone. To understand why this matters, let's take a quick tour through the history of web fonts.
A Short History of Web Typography
To grasp the significance of Google Fonts, you need to know that in before times there were no special fonts for websites. Instead, the letters in which websites were displayed were dependent on the browser.
Later, webmaster gained the ability to control typography to a caste. However, they were mostly limited to a handful of core fonts that had to be installed on the user'due south reckoner in guild to work. While workarounds were available, they were frequently cumbersome like using Flash or (private) images of letters to form text.
Information technology was only when CSS2 came out that spider web browsers gained the ability to download fonts from websites. Notwithstanding, for it to work, you had to own (meaning purchase) the typeface you wanted to employ on your site.
Plus, there was (and is) controversy about this techniques because it makes fonts freely downloadable for anybody even if they accept a commercial license. A articulate violation in some cases.
In short, using custom fonts on websites used to be expensive and/or complicated.
Enter Google Fonts
A lot of that changed when Google Fonts was introduced in 2010. While not the get-go service of its kind (Typekit was at that place earlier), Google Fonts has get the go-to place for custom web typography.
The about obvious reason for that is the fact that all typography within the library is available nether a complimentary license. With already more than 800 fonts available, frequently in several strengths, sizes and styles, that's a potent statement.
Secondly, as you will see, the service makes implementation of its fonts very piece of cake and frictionless on any website. The best office: you don't fifty-fifty have to host the font on your own server. Instead, you tin just point the user browser to Google and it volition become the font direct from them.
Sounds good, right? Now, if y'all want to know how to use Google Fonts with a WordPress website, just keep reading. That's exactly what we volition get to now.
How to Add Google Fonts to WordPress Manually
In that location are several ways to add Google Fonts to your website with a little coding. We will become through each of them beneath. Even so, they all beginning off the aforementioned mode.
one. Find the Right Font
The very first step is to go to the Google Fonts website and choose a font. There are several ways to do so.

If you are looking for 1 typeface in particular, the easiest way is to search for it directly by name in the upper right corner.
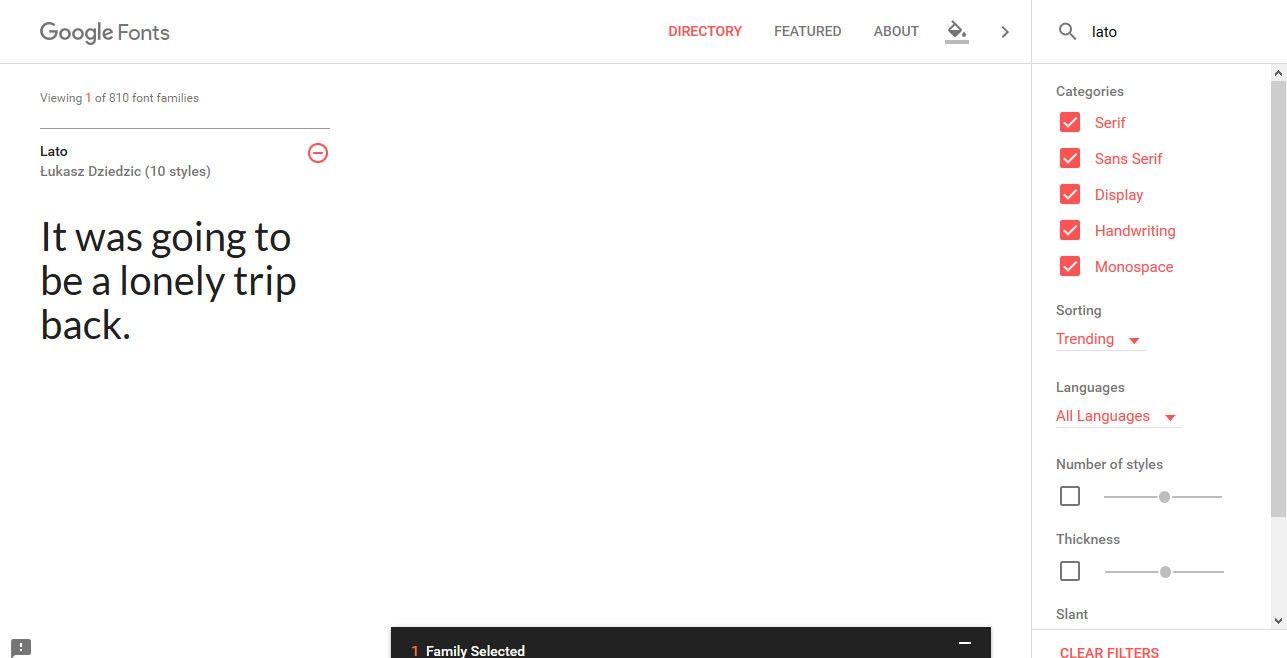
In case you don't know nonetheless and merely want to browse or get some inspiration, you can also employ the many filter options. Showtime of all, y'all can filter fonts by category:
- Serif — Significant fonts with small-scale squiggly lines at the stop. Times New Roman is a good instance for a serif font.
- Sans-Serif — These are unproblematic fonts without the little lines. Wait at the type we are using on this website to empathise what nosotros are talking about.
- Display — Detect fonts that are usable at large brandish such as for headings and titles.
- Handwriting — Typography that looks like someone drew information technology by paw.
- Monospace — Fonts with characters that all have the same spacing. Anyone who was already using computers in the late 80s has seen this.
Other options to sort the fonts are past trending or pop fonts, the date they were added or alphabetically past name. Y'all can also limit your search to fonts that include special characters used in certain languages, such every bit cyrillic.
If that isn't enough, you may also search fonts by style. Options for that include:
- Number of styles — How many unlike way options the font offers.
- Thickness — From very thin letters to very thick.
- Camber — Are the letters directly or slanted?
- Width — Search past the spacing between letters and characters.
The cool thing: Since the redesign, Google Fonts lets you preview exactly what the font of your selection is going to look like later.
To do so, merely click into the field where the font is displayed, marker the text and type in anything you want. Another option is to employ the drop-downwardly menu to view the unabridged alphabet, just the numerals, a random paragraph or a sentence. Plus, yous can modify size and style of the text to whatever you desire.
In my case, I'm going for a font I like named Lato. Since I know what I am looking for, I can but search it by proper name.
2. Select the Font
In one case you have settled on a font, click on the plus sign in the upper correct corner to add information technology to your pick. Your called font volition then appear in a new menu at the bottom of the screen.
Note that you tin as well add together several fonts and font families hither. Once satisfied, click on the bottom bar to open up your selection for the next steps.
3. Choose Styles and Boosted Character Sets
The window that opens will already contain information on how to add the fonts to your site. Still, before nosotros get to that, we first desire to pick the styles that nosotros need. For that, click Customize.
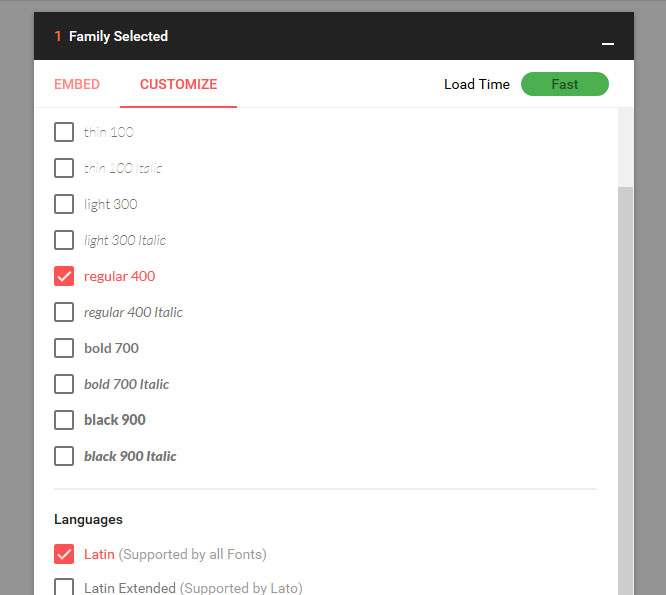
In this menu, tick boxes for the styles equally well as the languages/special character collections y'all need on your site.
Exist enlightened that the more you add, the more users will have to load on your pages. A load fourth dimension indicator in the upper right corner will tell yous how strongly your selection will impact the speed of your website.
In my example, I opt for the regular, calorie-free and regular italic style of my font.
4. Embed Fonts on Your WordPress Site
Afterwards that, it's time to get the fonts onto your site. Every bit mentioned, at that place several ways to do so, withal all of them start in the Embed section of the Google Fonts interface.
From here, we tin either embed our custom fonts via CSS, HTML or a WordPress function. While the latter is the recommended way, I'll testify y'all how to do the other ones as well.
a) Calculation custom fonts to WordPress using @font-face
With the CSS operator @font-confront yous can tell browsers to load fonts that are located on your own server.
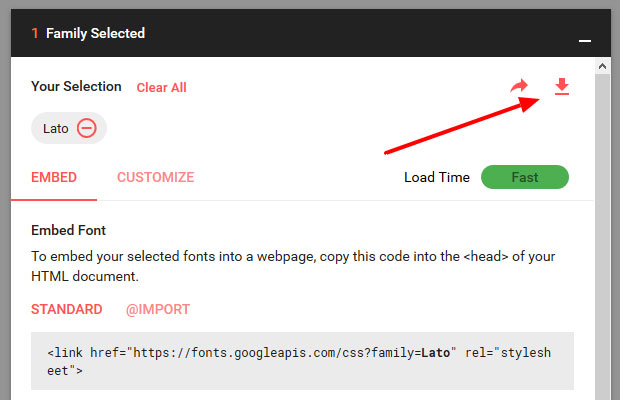
That ways, in order to use this method, yous outset demand to download whichever typeface you chose from Google Fonts and upload them to your own server via FTP.
Downloading can be washed with the icon in the upper correct corner.
After that, you need to identify the files on your server. A skilful location would be inside a fonts directory in your (child) theme folder. Once you have placed them there, you can call the fonts like this:
@font-face { font-family: Lato; src: url('http://yoursite.com/wp-content/themes/yourtheme/fonts/Lato-Regular.ttf') format('truetype'), url('http://yoursite.com/wp-content/themes/yourtheme/fonts/Lato-Italic.ttf') format('truetype'), url('http://yoursite.com/wp-content/themes/yourtheme/fonts/Lato-Light.ttf') format('truetype'); } The problem with this method: For the best results you might have to add the fonts in several formats. While most modern browser tin bargain with .ttf (Truthful Type Fonts) files, not all of the older ones tin can.
Too, unless you accept measures to change it, fonts on your server won't go automatically updated like they are when y'all use their counterparts hosted by Google. For that reason, this is not quite the recommended method.
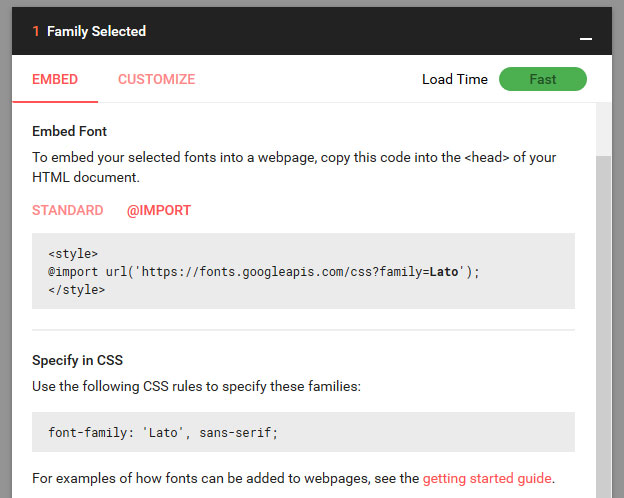
b) Calling Fonts via CSS Using @import
A second option to add custom fonts to WordPress is to load them within your stylesheet via @import. This method is similar to @font-face up, however, instead of loading the font from your own server, you are calling it from somewhere else (in this instance Google).
Setting this up is pretty like shooting fish in a barrel every bit Google provides a ready-made solution. But click @import in Google fonts to detect the necessary CSS.
Now all you need to do is copy it (without the <style> brackets) and paste it at the beginning of your theme's stylesheet. Save and you lot are done.
While this way to add together custom fonts is easy, it can be bad for site functioning because it blocks parallel downloads. That means, browsers take to finish the download of the font before they tin can move on to the rest of your site. Peculiarly if you are importing several fonts, this can really ho-hum down site (fifty-fifty if Google combines them into a single asking).
c) Embedding Google Fonts via HTML
One of the easiest ways to add a font to your website is to merely copy the code provided by Google and add it to the header.php file of your theme. All you lot need to make sure is that information technology goes inside the <head> section of your site above the telephone call for your main stylesheet like and so:
<link href="https://fonts.googleapis.com/css?family=Lato:300,400,400i" rel="stylesheet"> <link rel="stylesheet" type="text/css" href="http://yoursite.com/wp-content/themes/yourtheme/style.css" media="all"> Save and you are adept to go. To brand things faster, here, too, yous can combine several fonts into one download.
Information technology can go a little problematic, notwithstanding, in case you are using a theme framework or non a child theme. If that's so, you might not have a header.php or run the hazard of having your changes overwritten at update.
Plus, with this method, if some other component of your site calls for the aforementioned font or stylesheet (unlikely, simply possible) it would be loaded more than than once, once more increasing the loading time of your site.
For that reason, it'due south a) always amend to utilise a kid theme and b) to use functions.php to add together Google fonts to your WordPress website like below.
d) Enqueueing Google Fonts — The WordPress Way
The terminal — and recommended — fashion to add Google fonts to your site is to use the wp_enqueue_style role.
This handy slice of code tells WordPress to add your font to the header department of every page on your site and information technology will also keep stylesheets from beingness loaded more than once. Therefore, if you lot have anything similar a font to add together to WordPress, this is the mode to get.
To make it work, all you demand is the link to the fonts on Google's server, without all the stuff around information technology. In my case, that'south https://fonts.googleapis.com/css?family=Lato:300,400,400i
Now all we we need to do is wrap some code effectually it in order to to make information technology load properly and then add together this to the functions.php file of our (kid) theme.
part custom_add_google_fonts() { wp_enqueue_style( 'custom-google-fonts', 'https://fonts.googleapis.com/css?family=Lato:300,400,400i', false ); } add_action( 'wp_enqueue_scripts', 'custom_add_google_fonts' ); Relieve, upload and that should do the pull a fast one on. Just remember to replace the link with your own.
5. Call Google Fonts in Your Stylesheet
By now you should have your custom font fully integrated on your site and can get-go using it in your design. To do and then, all that'due south left is calling it somewhere.
Google is actually so overnice to requite you the necessary CSS for that — including a fallback font!
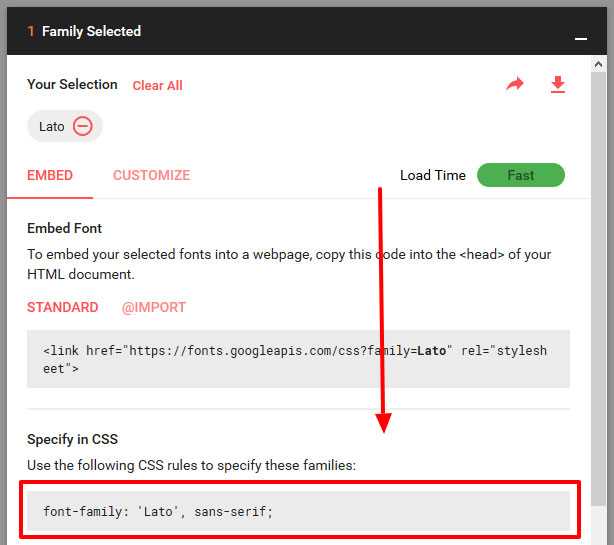
An case of how yous can use information technology on your site is this:
.entry-title { font-family unit: Lato; font-weight: normal; } That'due south it. Not and so hard, was information technology? Still, if yous are not so much the DIY blazon, you can also attain the aforementioned matter with a WordPress plugin. We will prove yous how to practice that now.
Calculation Google Fonts to WordPress With a Plugin
Besides the manual fashion, nosotros as well take several plugin options to add Google fonts to WordPress, the most popular being Piece of cake Google Fonts. Here's how to use it.
1. Install the Plugin
As the very first footstep, we need to become the plugin onto our site. For that, just go to Plugins > Add New and search for its name. Find it in the list and click Install Now.
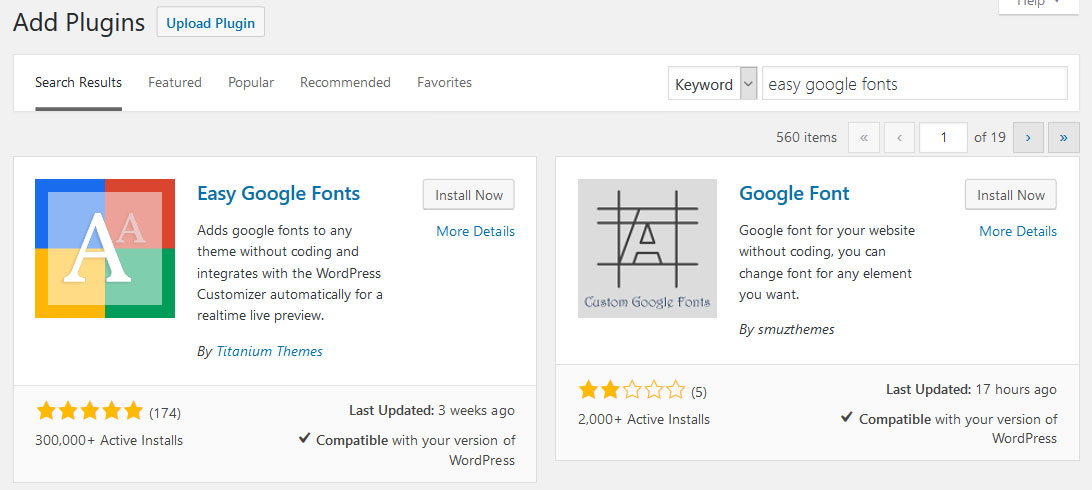
After installation is washed, don't forget to activate!
2. Change Fonts
After Easy Google Fonts has been installed, information technology adds a new menu called Typography to the WordPress customizer (which you tin find under Appearance > Customize).
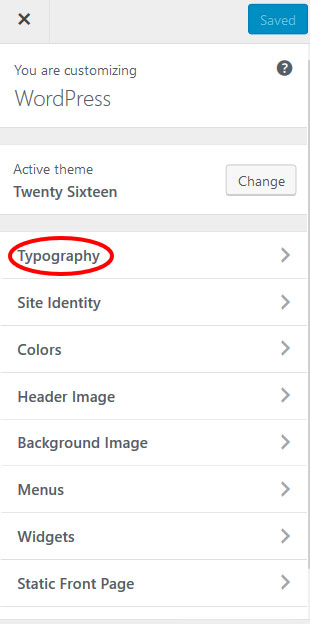
From here, yous tin can at present control fonts for all typography on your site, from headings to paragraphs.
To show you how it works, let's say I wanted to change my H2 heading to the font Appearance Pro. For that, I first need to click on the Heading 2 carte du jour in Default Typography to open it.
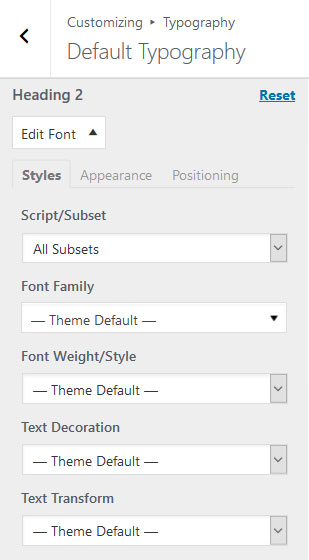
If you don't know exactly which font to utilize, you tin also limit your choices to sure subsets (in case that's important for your site).
In my example, I only click on Font Family unit to open the options. Then, I type in the proper name Advent Pro and click on it when it appears.
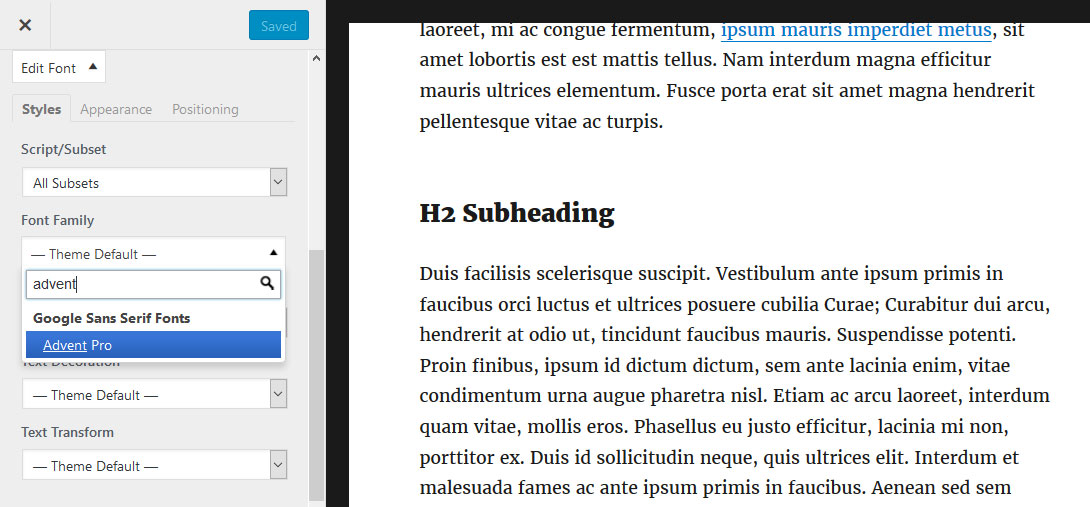
When I exercise so, immediately the font volition modify in my preview window.
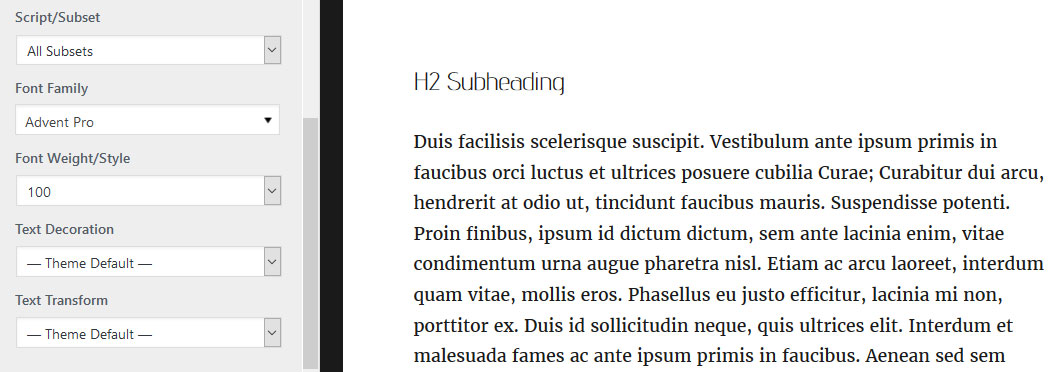
If I desire, I can now also change the way, add text ornamentation similar underlining and transform information technology to capital letter or lower case.
In improver to that, nether Appearance I can also brand bigger changes like arrange the font color, background color, font size, line summit and alphabetic character spacing.
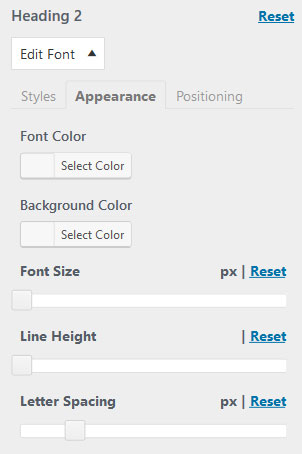
Furthermore, Positioning gives united states of america the option to change margins, padding, border, edge radius and display options.

When you lot are fine with how things expect, saving the changes will make them visible on your site.
three. Adding Your Ain CSS Classes
You will find that in some cases the plugin won't work with some of the typography.
For example, in the Twenty Sixteen default theme, I found myself unable to modify the H1 heading in the customizer. That'south because this heading is not only called by the standard H1 tag but also a CSS course chosen .entry-championship (as I found out later looking at the heading with the Firefox developer tools). For that reason, the plugin was unable to change its font.
If you get into a similar situation, you lot tin solve it by creating your own font controls nether Settings > Google Fonts.
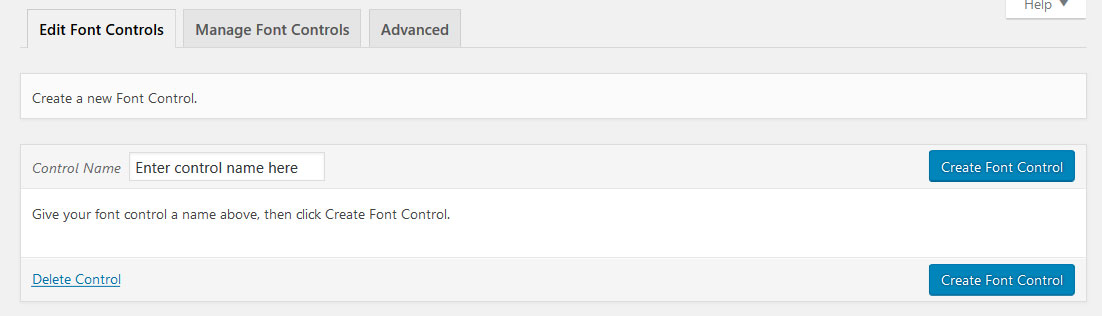
Here, your first task is to blazon in a name for your font control in the respective field. I am going with Entry championship. Later on that, click Save Font Control.
In the next screen, you need to add the CSS selector you lot want to manipulate. As mentioned earlier, in my case that is .entry-title.
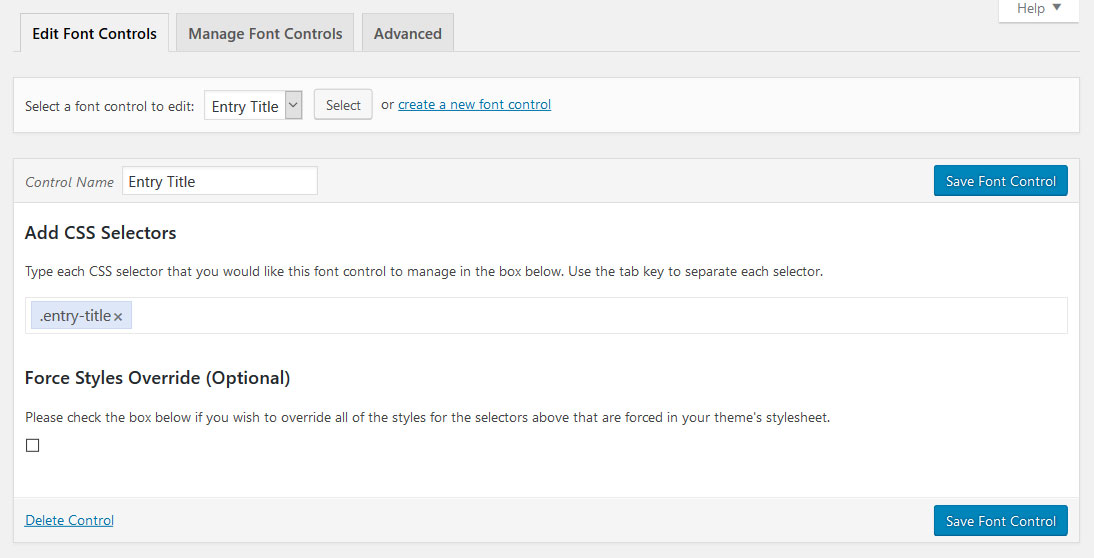
You have the pick to add several selectors if necessary simply one is enough for our example.
Once washed, save the font control again, and then head back to the customizer. Under Typography you volition now observe a new carte particular called Theme Typography. This is where will find your custom font controls.
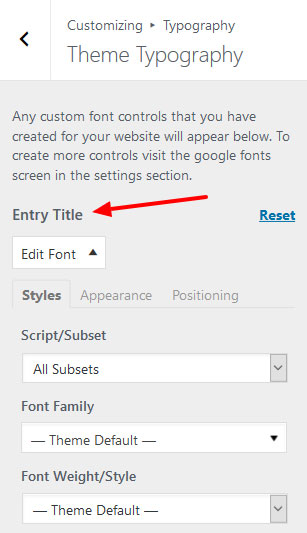
Just like before, y'all can open a drop-down menu to change the font family, style and other options for the entry title. Lo and behold, this fourth dimension information technology works!

Awesome, correct? And not difficult at all. Yet, should it nonetheless non work for you, y'all might have to cheque the Force Styles Override box in your font control menu. Yet, in most cases the normal way should be sufficient.
That's it! Y'all now know how to add together Google fonts to WordPress both manually besides every bit via plugin. If yous want to try an culling to Easy Google Fonts, you can await into WP Google Fonts which has similar functionality. However, for at present we are done.
Adding Custom Fonts to WordPress – Not every bit Hard as It Sounds
Custom typography is a not bad option to bandbox up your site design, make your site more unique and add manner and personality.
While it used to exist difficult in the past, thanks to services similar Google Fonts, these days anyone can add custom fonts to their WordPress website in mere minutes.
In the commodity higher up, yous accept learned several ways to add together Google Fonts to your site, first past hand and and then with a plugin.
By now, you are fully prepared to change headings, paragraphs and every other text element on your site to a font of your liking. Accept good advantage of it. But exist aware, with great power likewise comes smashing responsibility.
How do y'all add together custom fonts to your WordPress site? Any boosted tips or thoughts on the above? Let us know in the comment section below.

Source: https://www.designbombs.com/add-google-fonts-wordpress/
Posted by: bernalvends1944.blogspot.com
0 Response to "How To Upload Custom Font To Wp Elementor Css"
Post a Comment